Today we cover how to install Kali Linux in Virtualbox on Mac.
In the tutorial below we explain all the steps needed to install Kali Linux in VirtualBox on a Mac. We also answer common questions and provide solutions to common problems people face while trying to install Kali Linux in VirtualBox on Mac. After today’s tutorial you will have a fully functioning penetration testing system running Kali Linux in VirtualBox.
Let’s get right to it!
Download Kali Linux for VirtualBox
Start by downloading the appropriate image from the Offensive Security VM download page.
Make sure you download the correct file for your virtual machine software. In this tutorial I will be using VirtualBox. I highly recommend using the Torrent download option. The download rates on the Offensive Security servers are rather limited. Downloading the whole 3GB file will take some time. Using the Torrent file allows you to connect to fast peers willing to host the download. Which ever route you choose wait for the download to complete and get VirtualBox set up while you are waiting for your download to complete.

Grab yourself a coffee and wait for that download to complete. Then we will import the appliance file into VirtualBox.
Import the Kali Linux appliance
The wonderful folks over at Offensive Security have been nice enough to package up a full VirtualBox appliance running Kali. The appliance file will take care of creating the virtual machine for us.
You may notice an .ova extension on the file you downloaded. The .ova extension is for virtual machine appliance files and is supported by many virtualization applications such as VirtualBox and VMWare.
After you finish downloading the file, open VirtualBox and select File > Import Appliance…
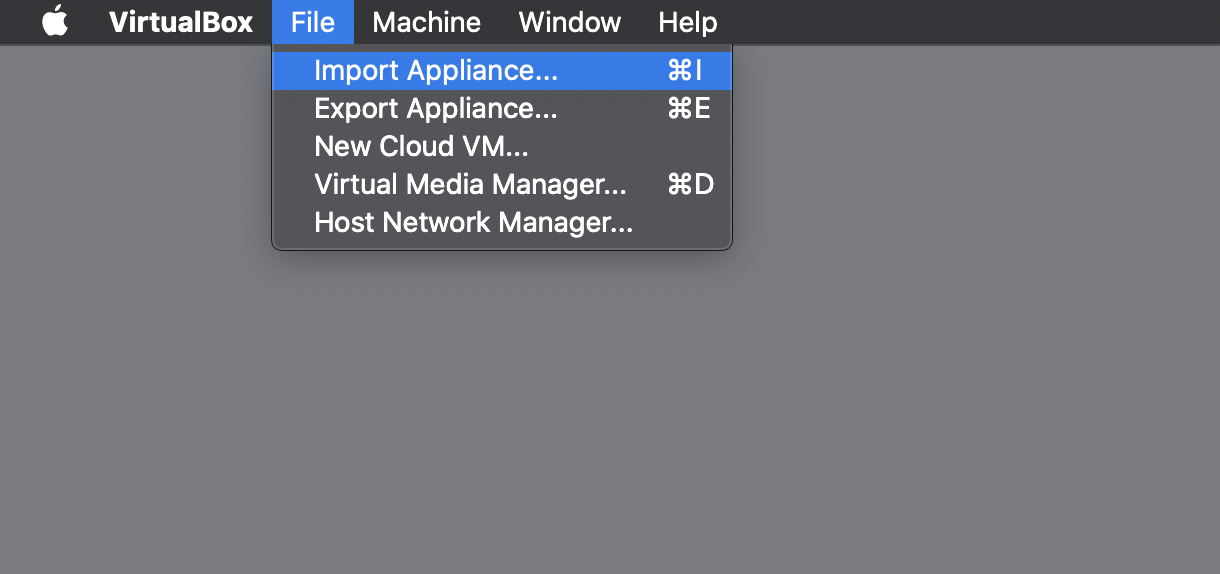
Make sure the source is set to Local File System (assuming the downloaded file is on your machine). Then click the folder icon to navigate to the file you downloaded from Offensive Security and select Open.


After clicking Open VirtualBox will take a few moments to extract the file’s contents. After the import is complete you will be greeted with a window showing all of the appliance’s details. Take a moment to review these details and tweak anything you want.
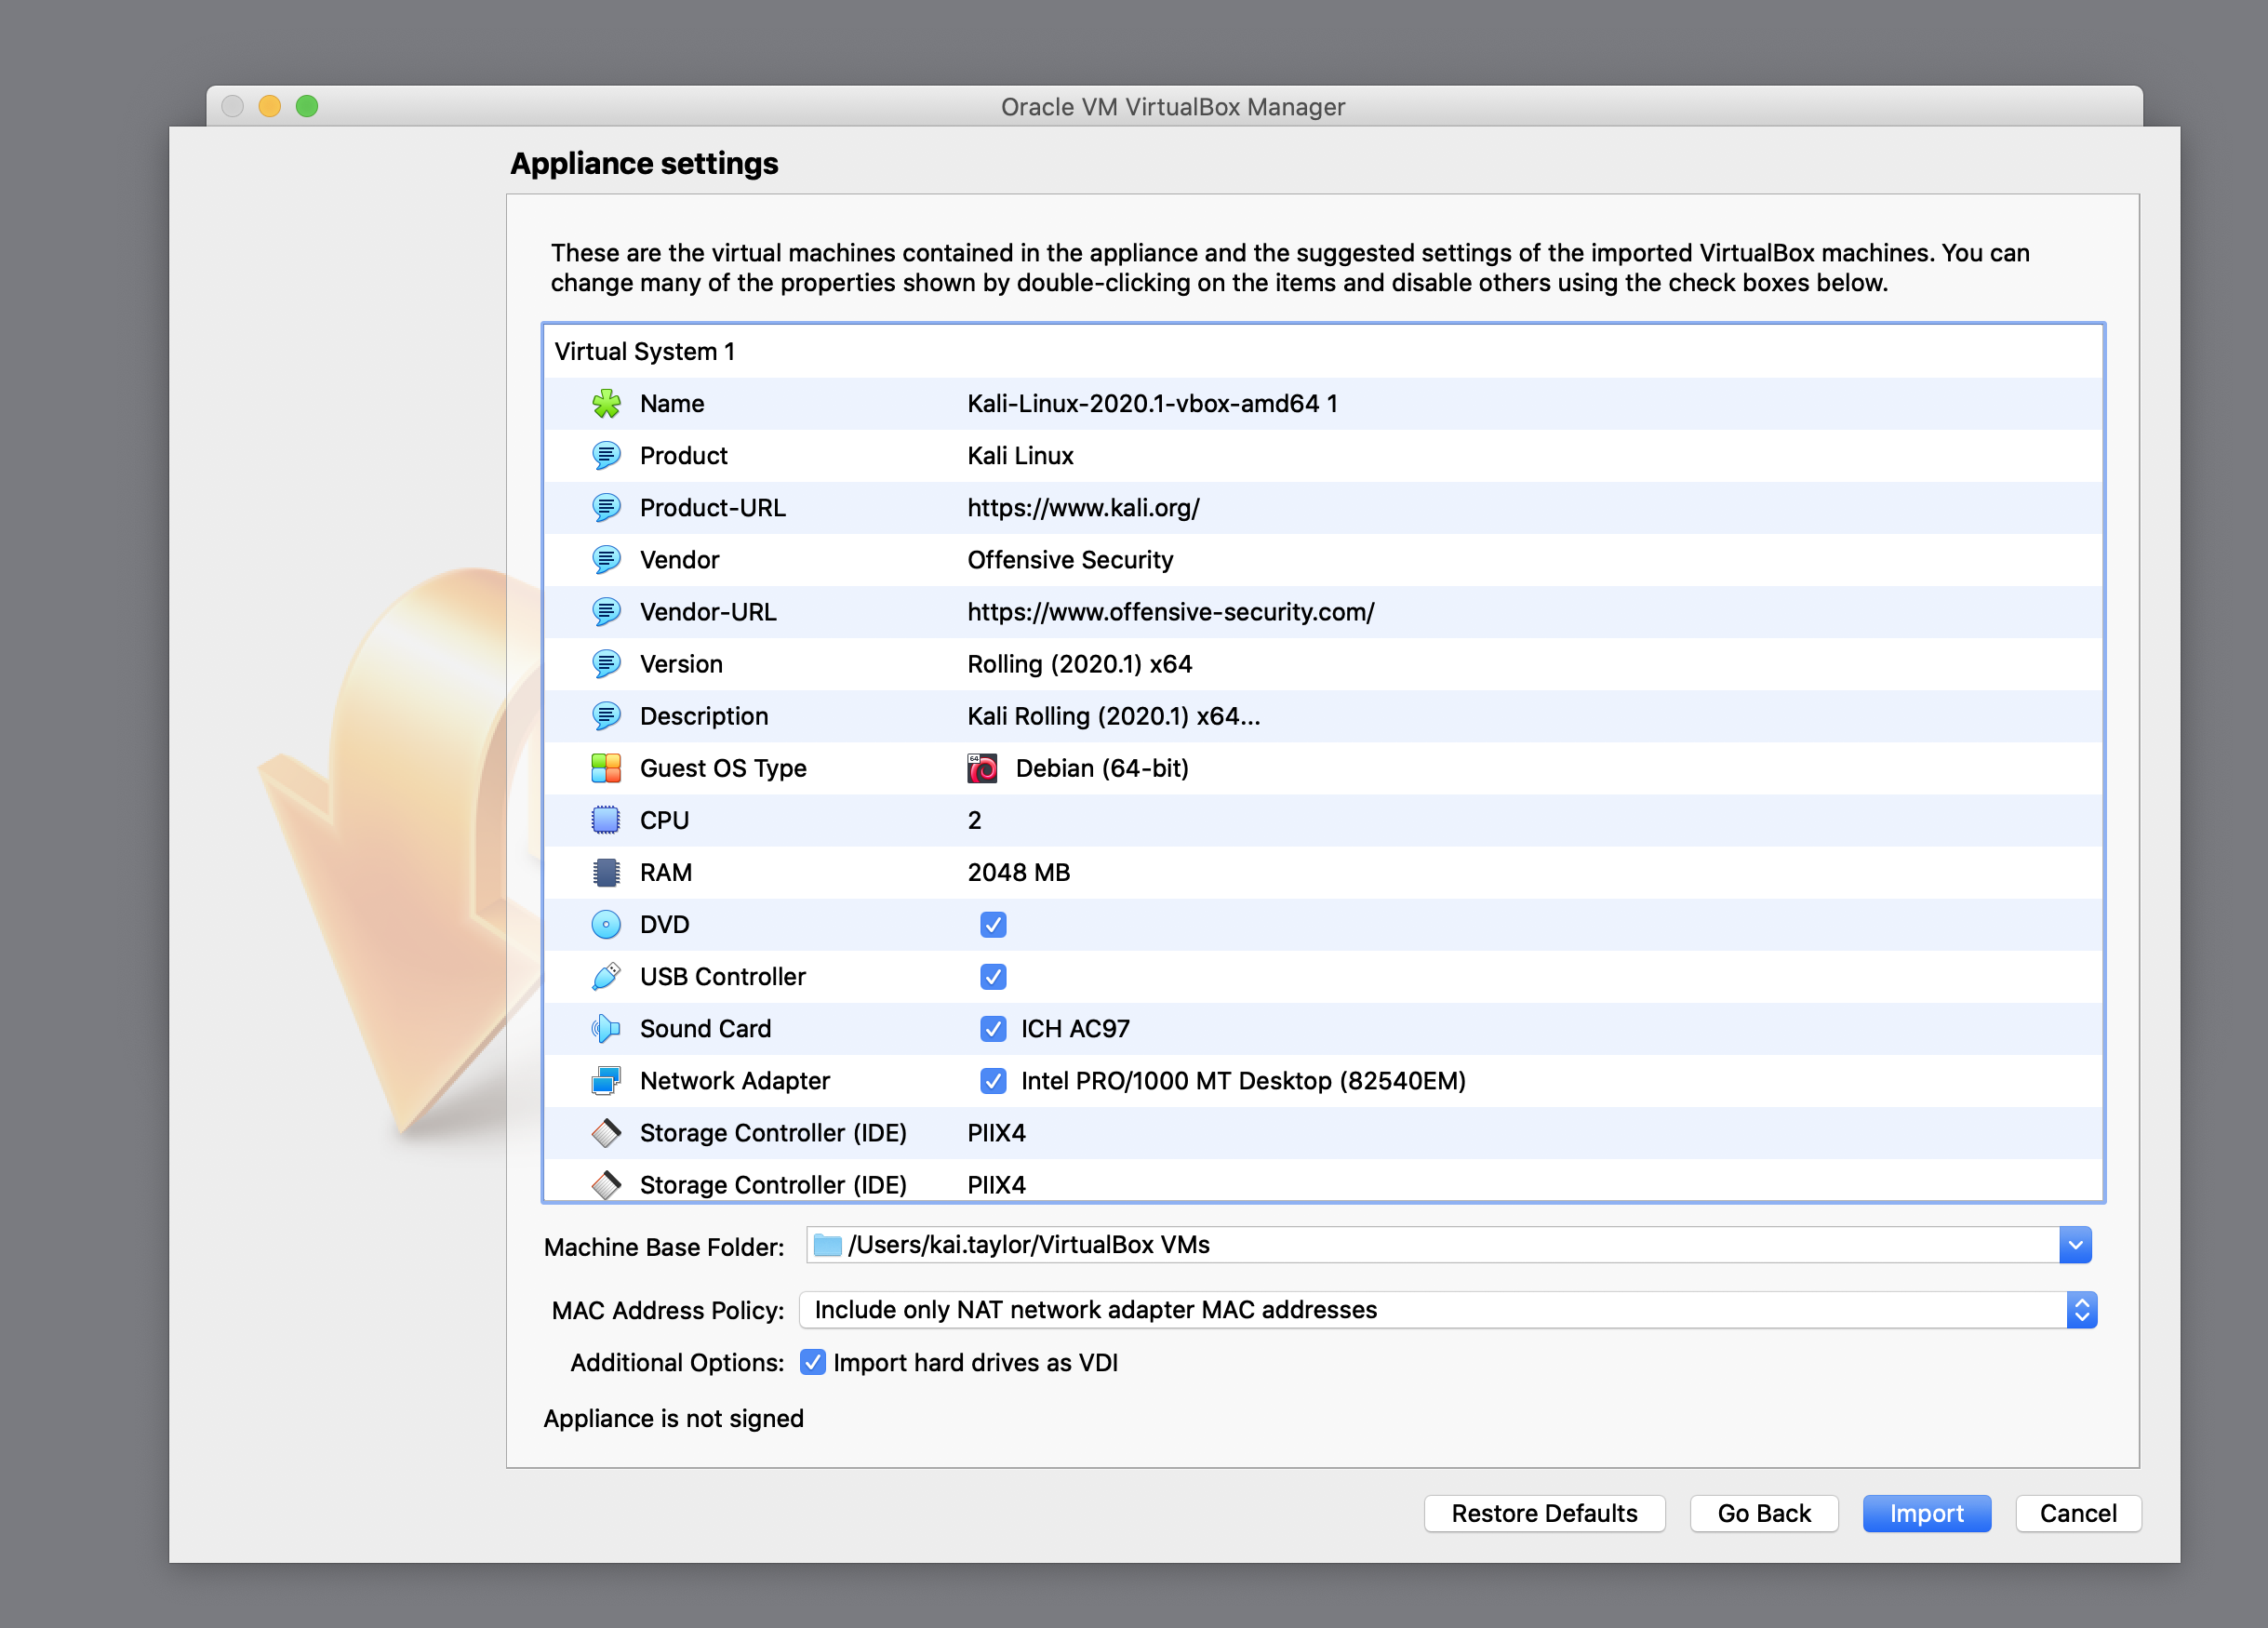
Once everything is satisfactory click Import. Kali Linux 2020 now requires accepting the Kali Linux Open Source license agreement. Click Agree and then wait for the import to complete. This should not take more than a few minutes on a decently powered system.


Tweak the virtual machine
Feel free to fire up the virtual machine once the import is complete. Before that however, I would recommend tweaking a virtual machine settings. If you are like me and installed Kali Linux in VirtualBox on a Mac Book Pro with Retina Display then you will probably be greeted with a microscopic display. We’ll fix that next.
Lets start by selecting our newly created virtual machine in the list on the left. Click the Settings icon to bring up the virtual machine settings.
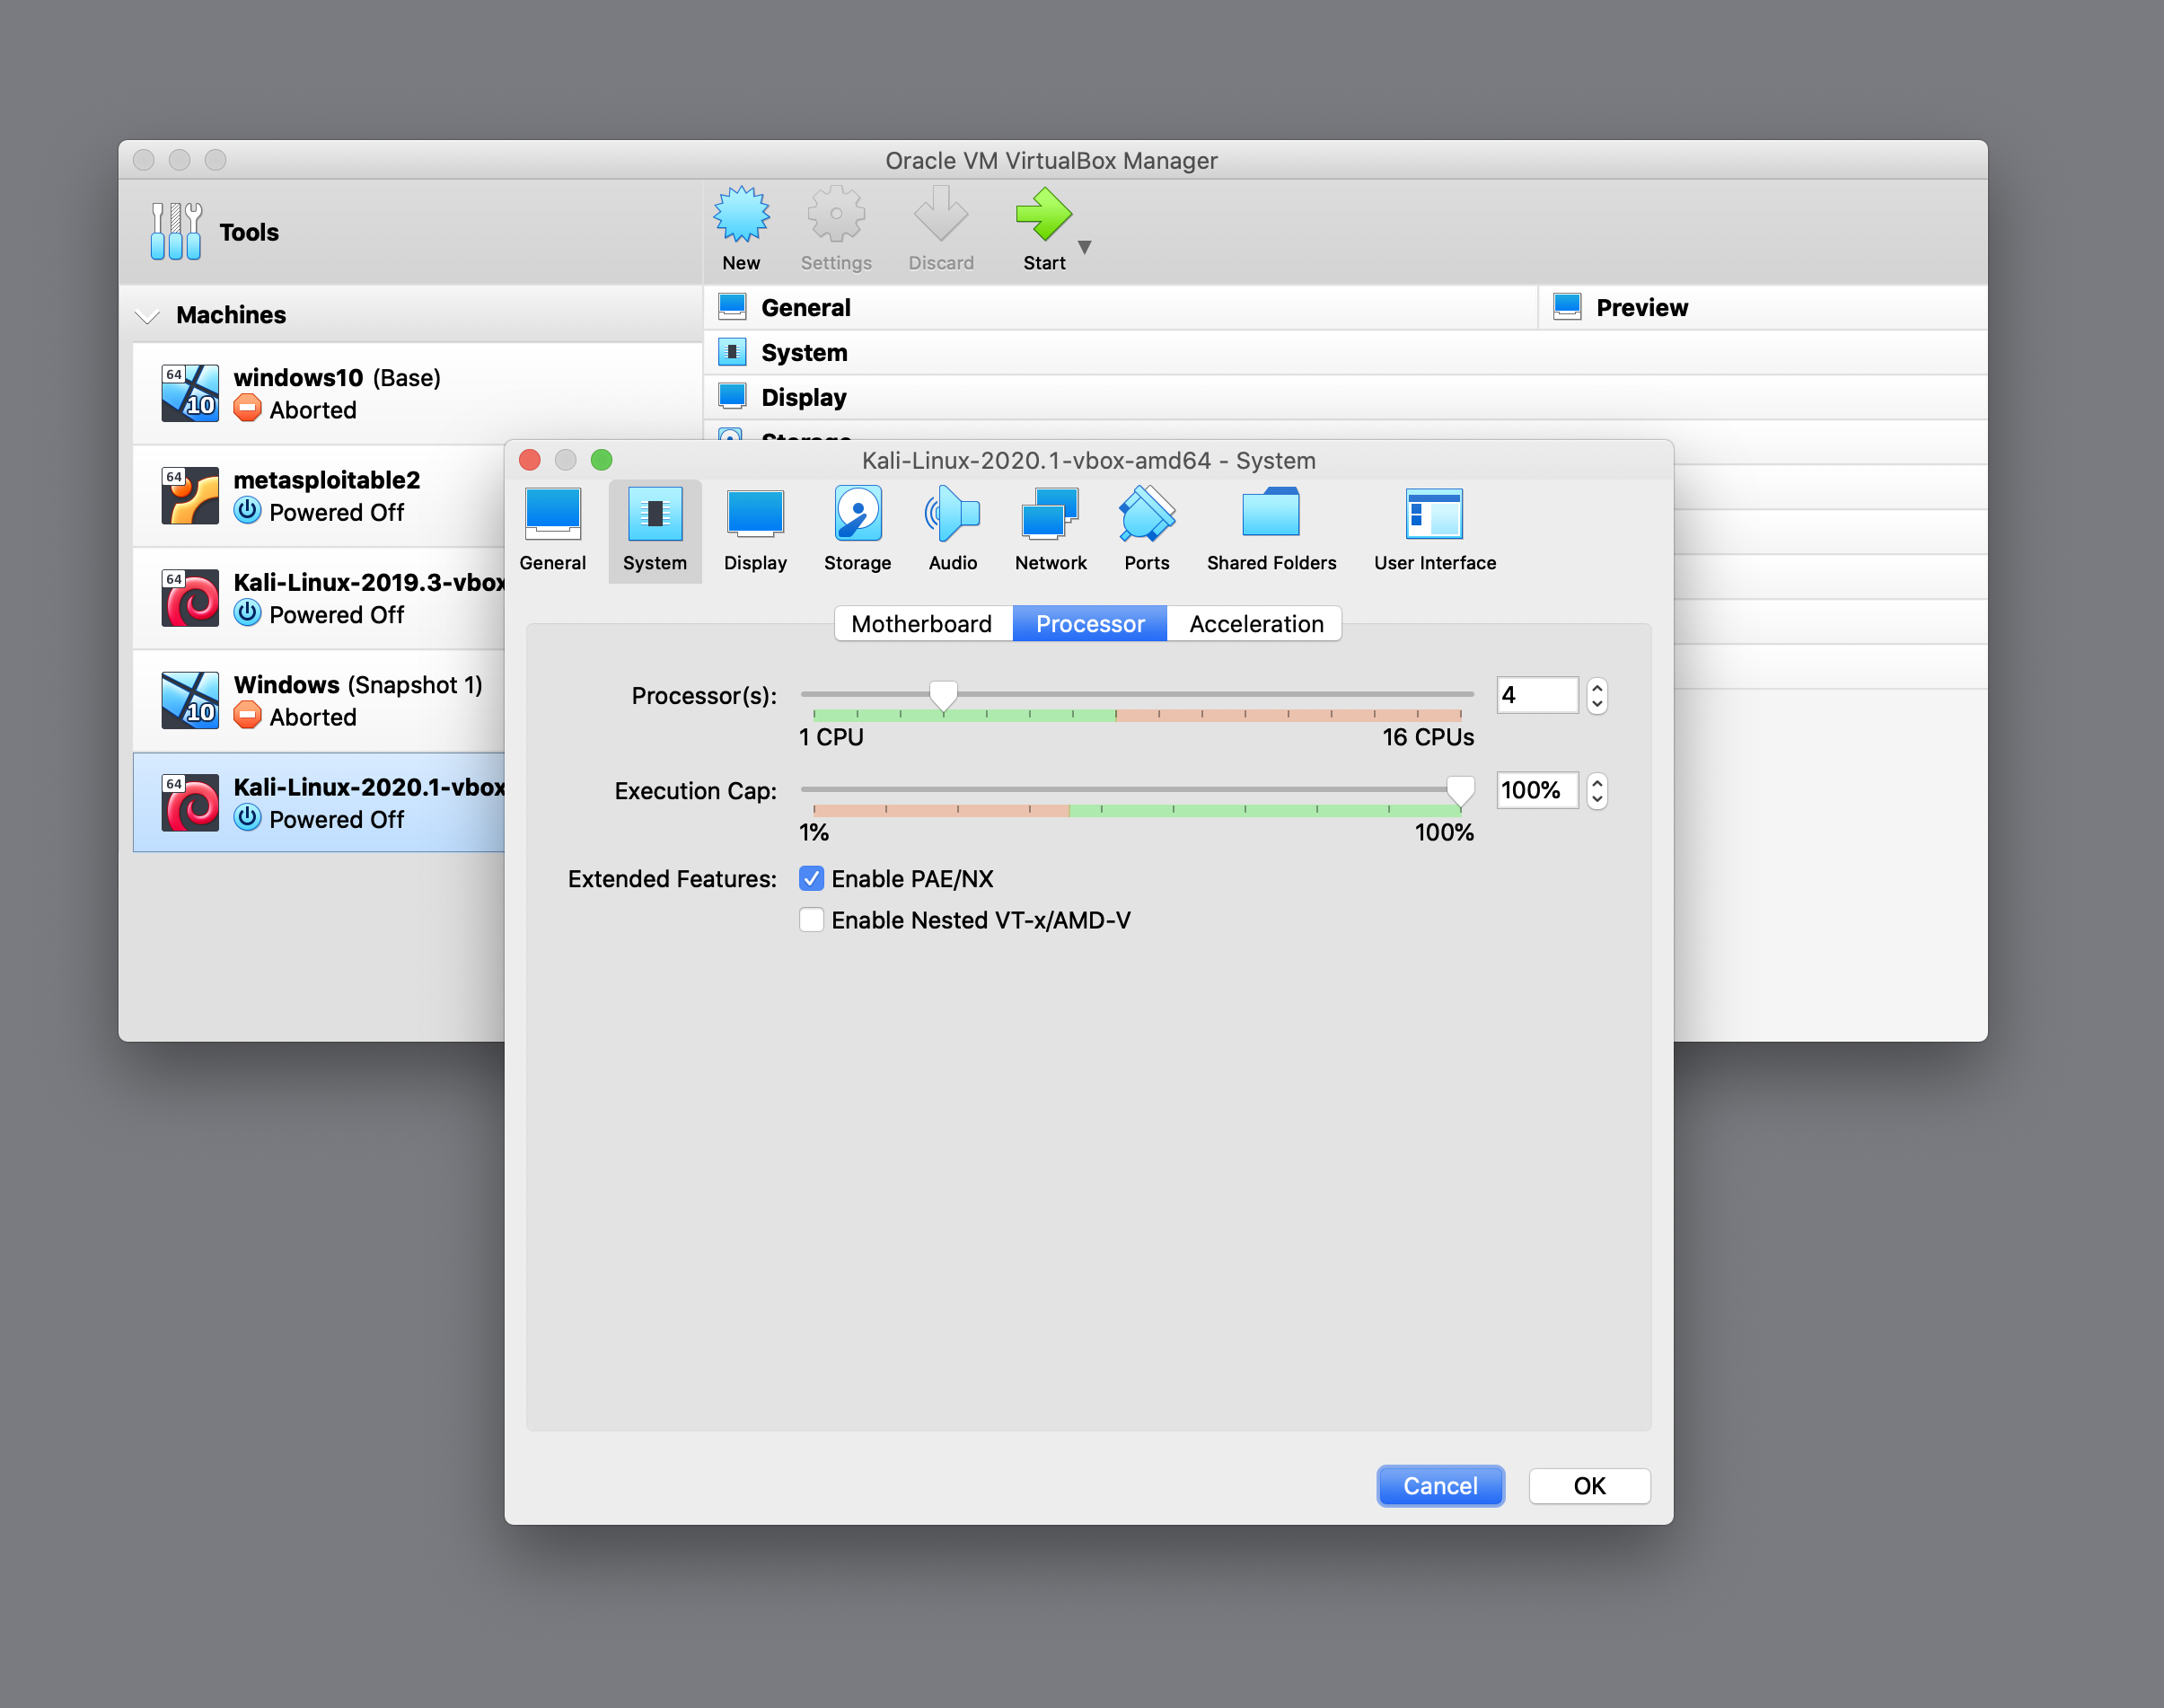
First click System and then Processor. I usually like to bump my processor count up to 4. If you have the cores available I definitely recommend allocating more.
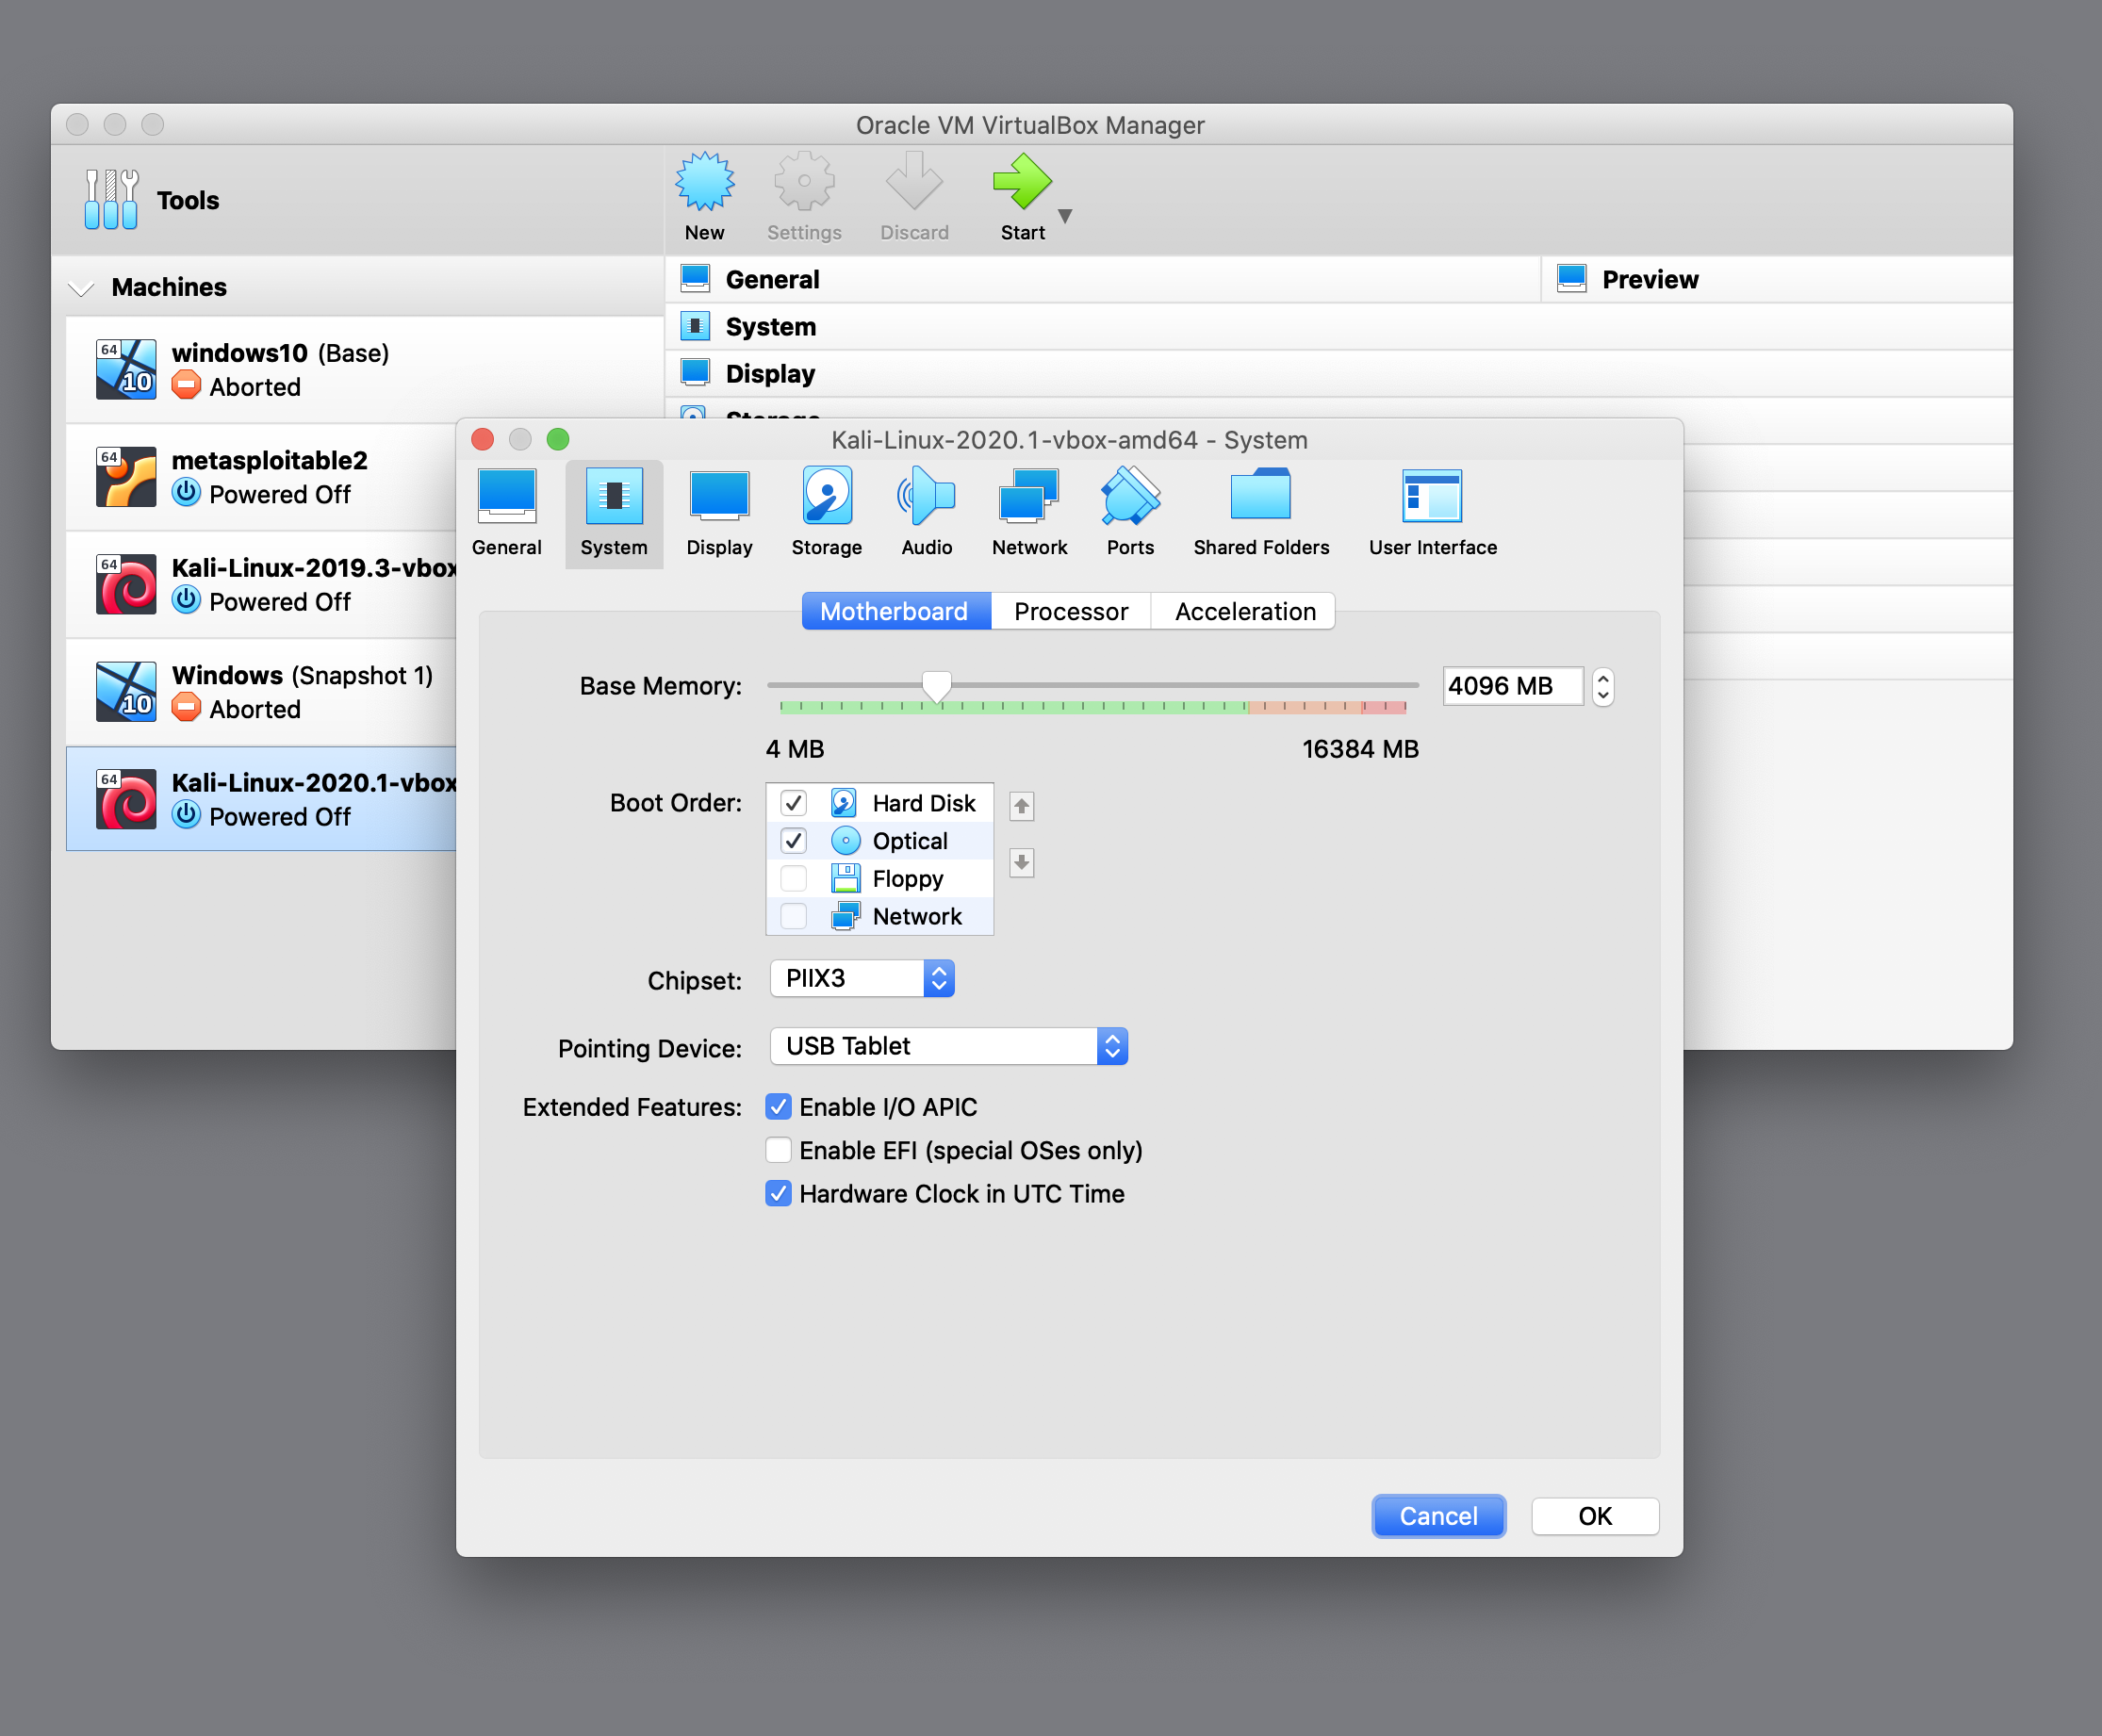
Above all, let’s adjust the Motherboard settings. I like to increase the base memory allocation to 4096 MB (4GB). This makes for a slightly snappier interface especially if running the full desktop environment.
Adjust Kali Linux display settings for VirtualBox
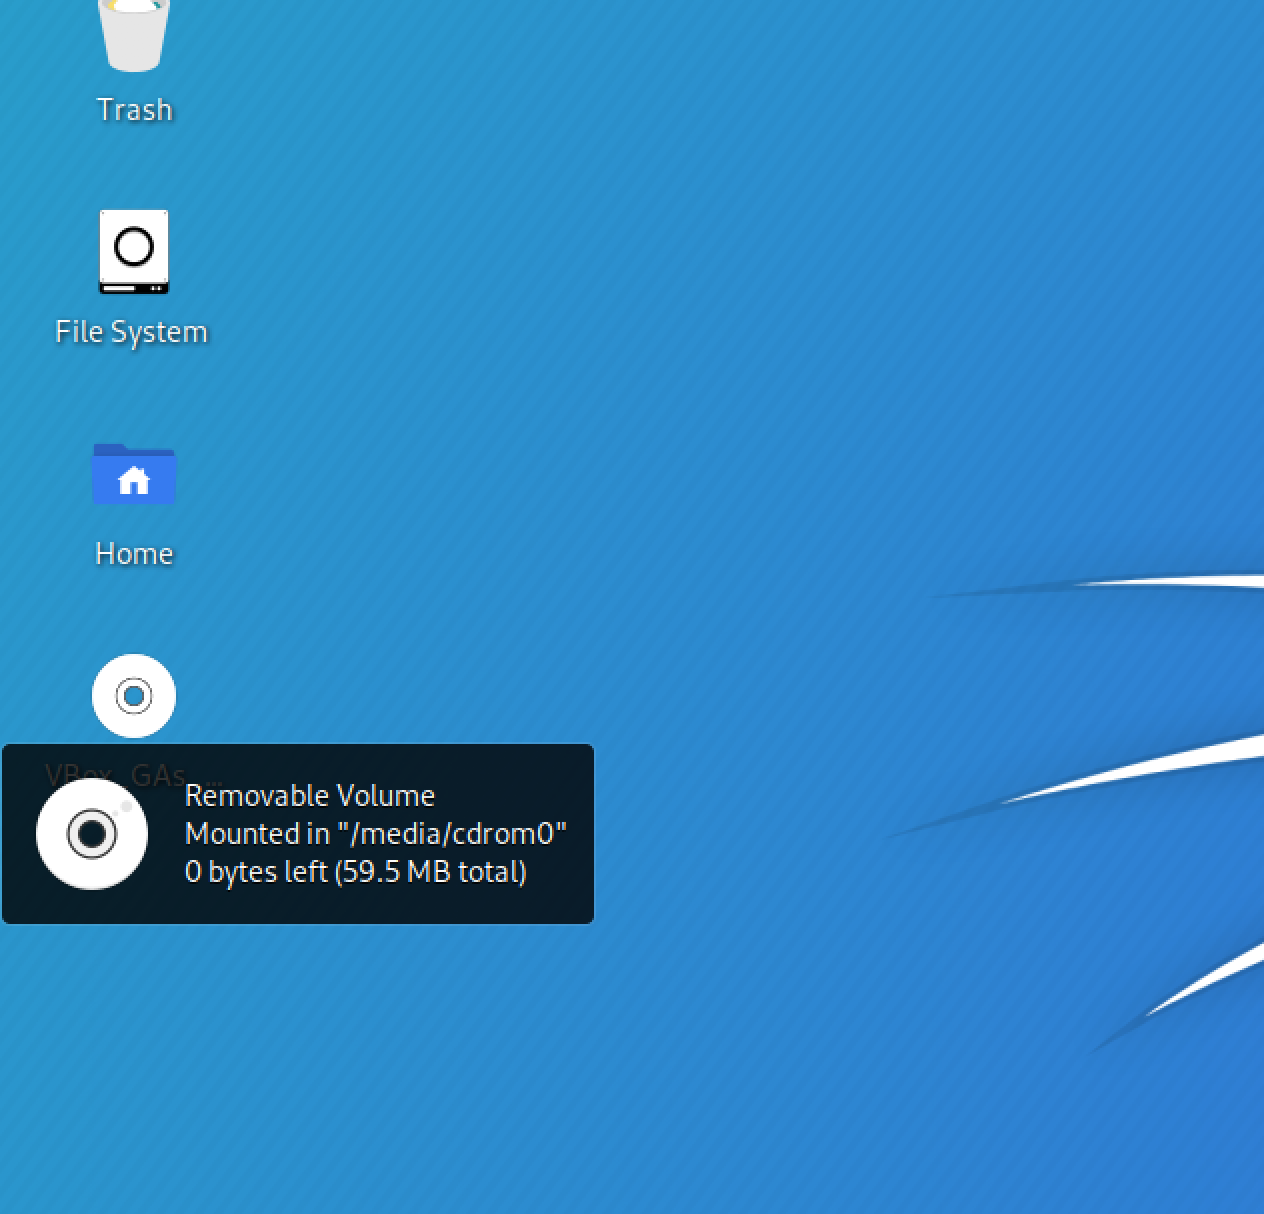
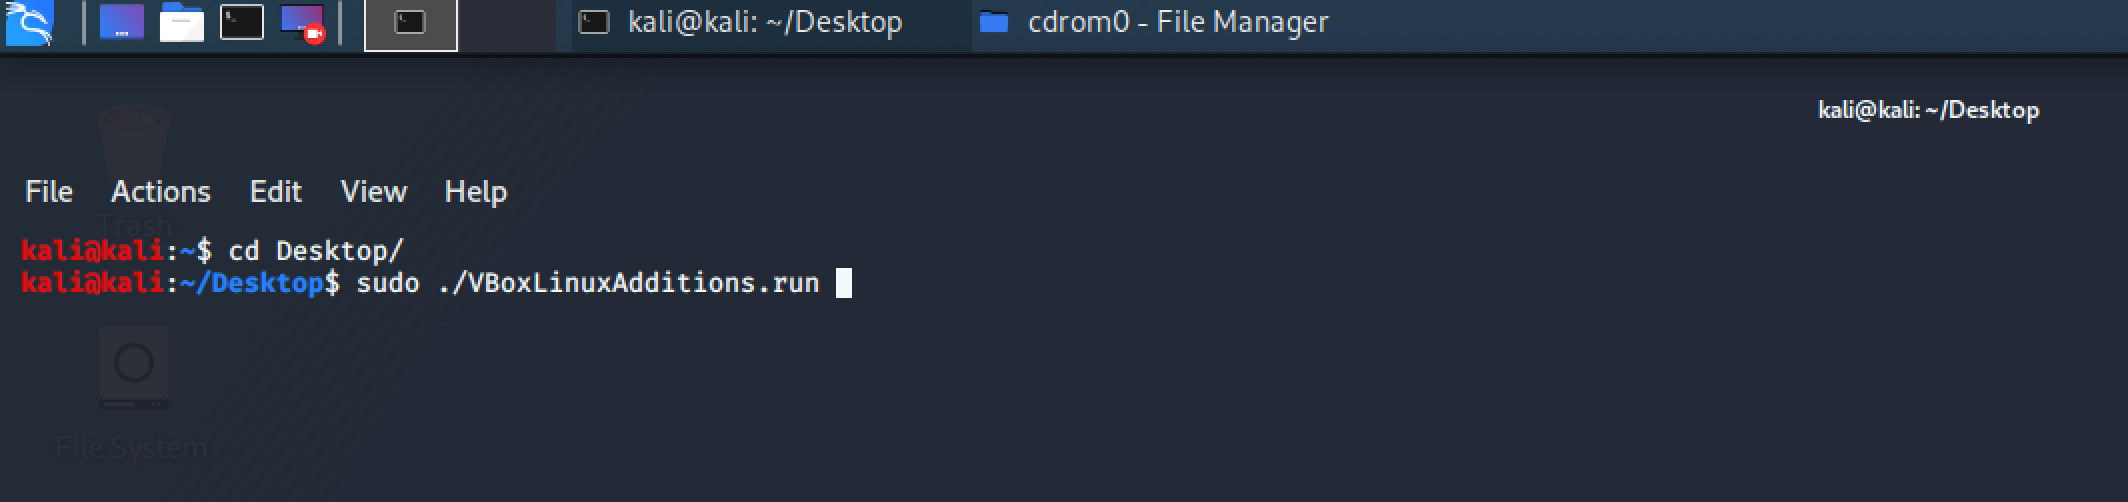
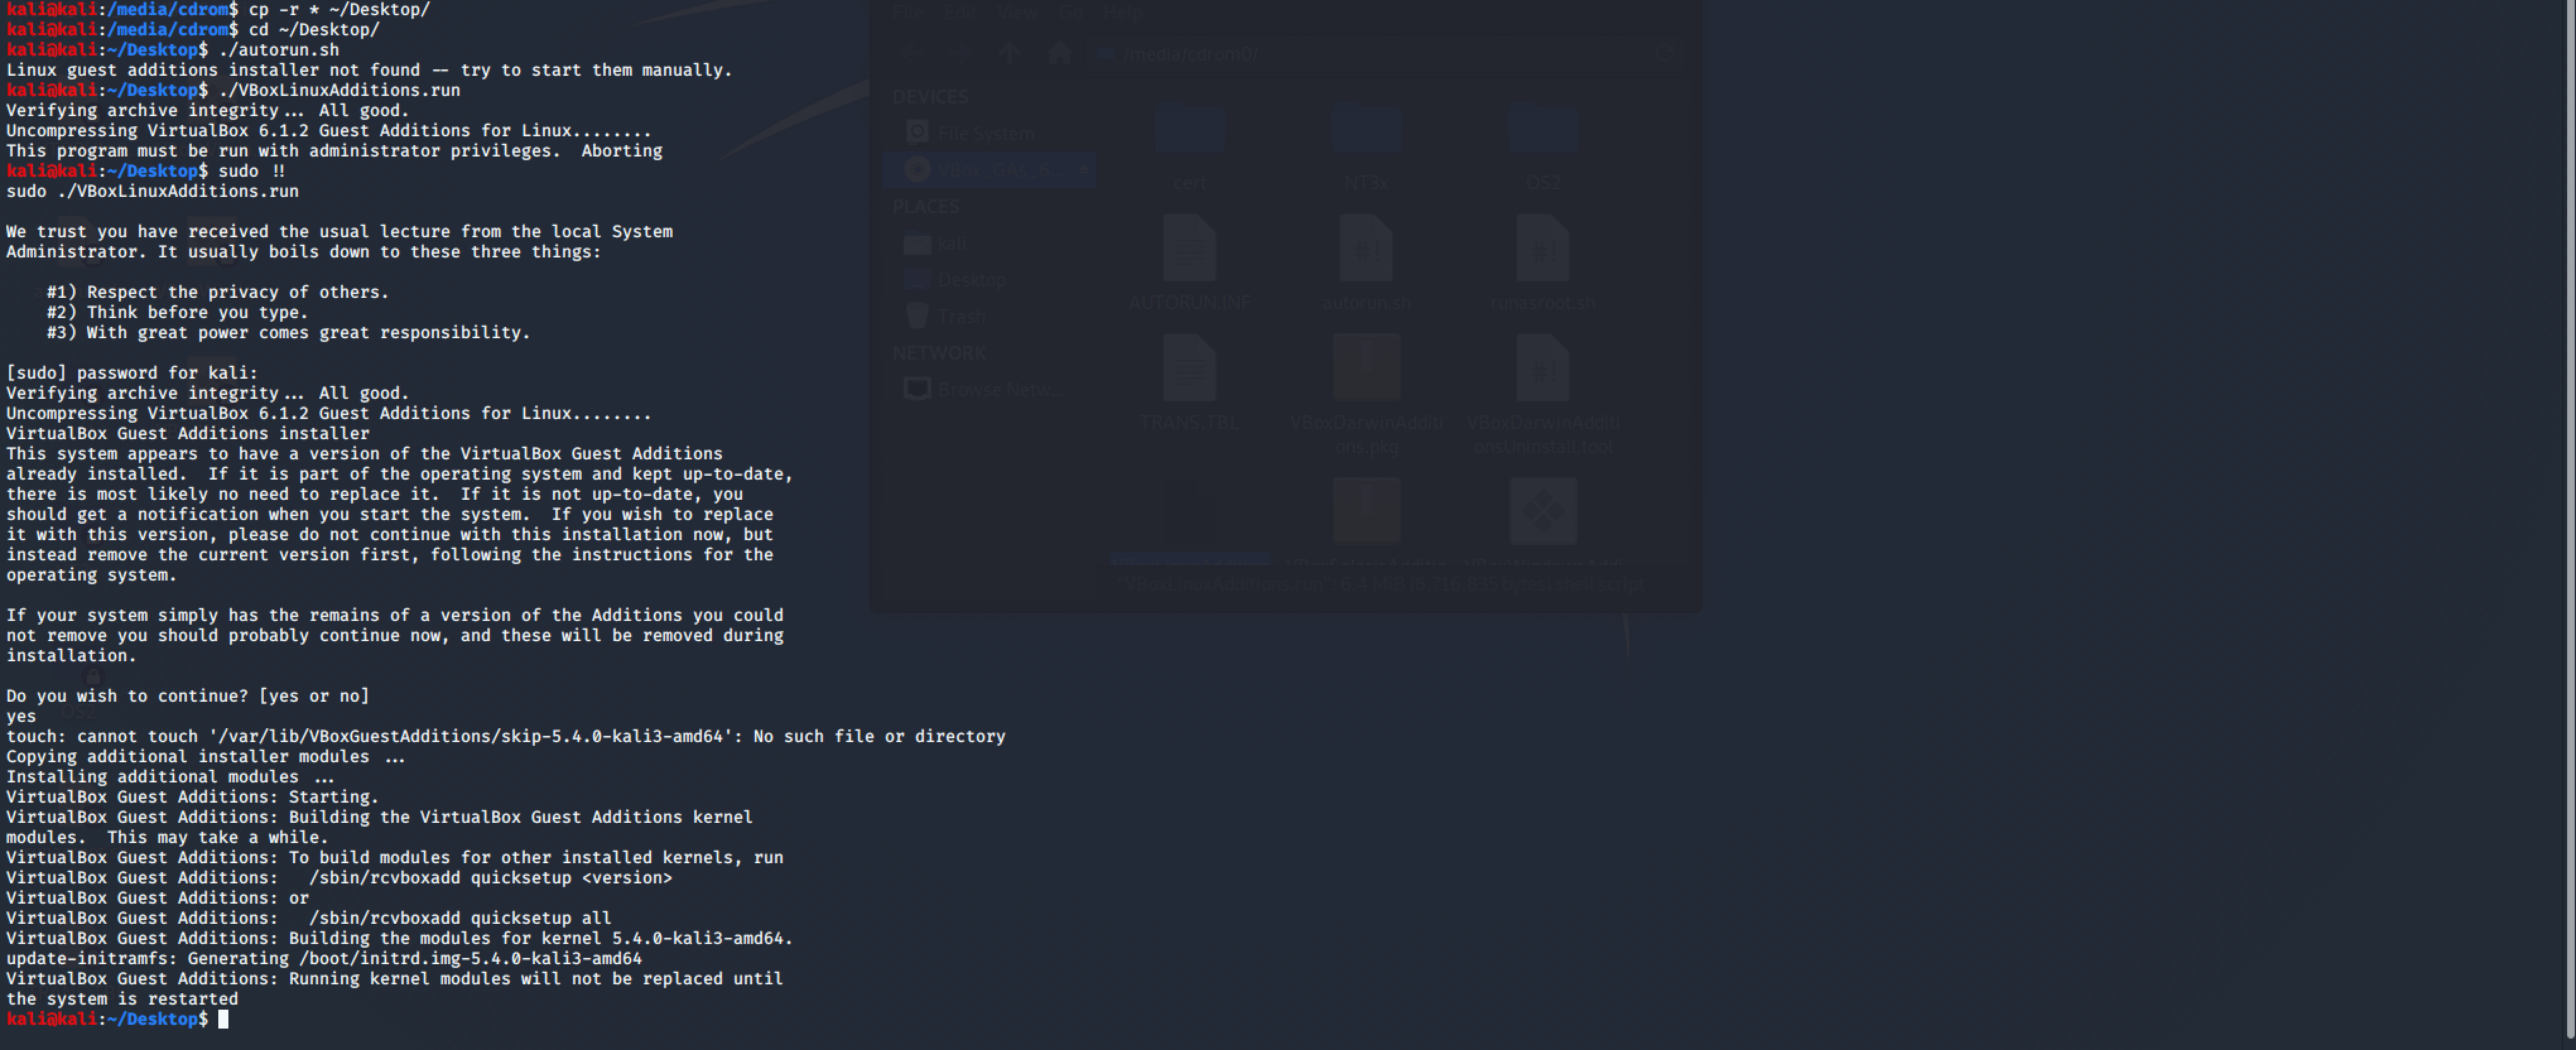
After adjusting the virtual machine settings, fire up Kali and insert the guest additions. This part is crucial as it updates the virtual display drivers. The updated drivers give us much better control of the guest screen resolution. For instance we can take full advantage of the MacBook Pro’s retina display.


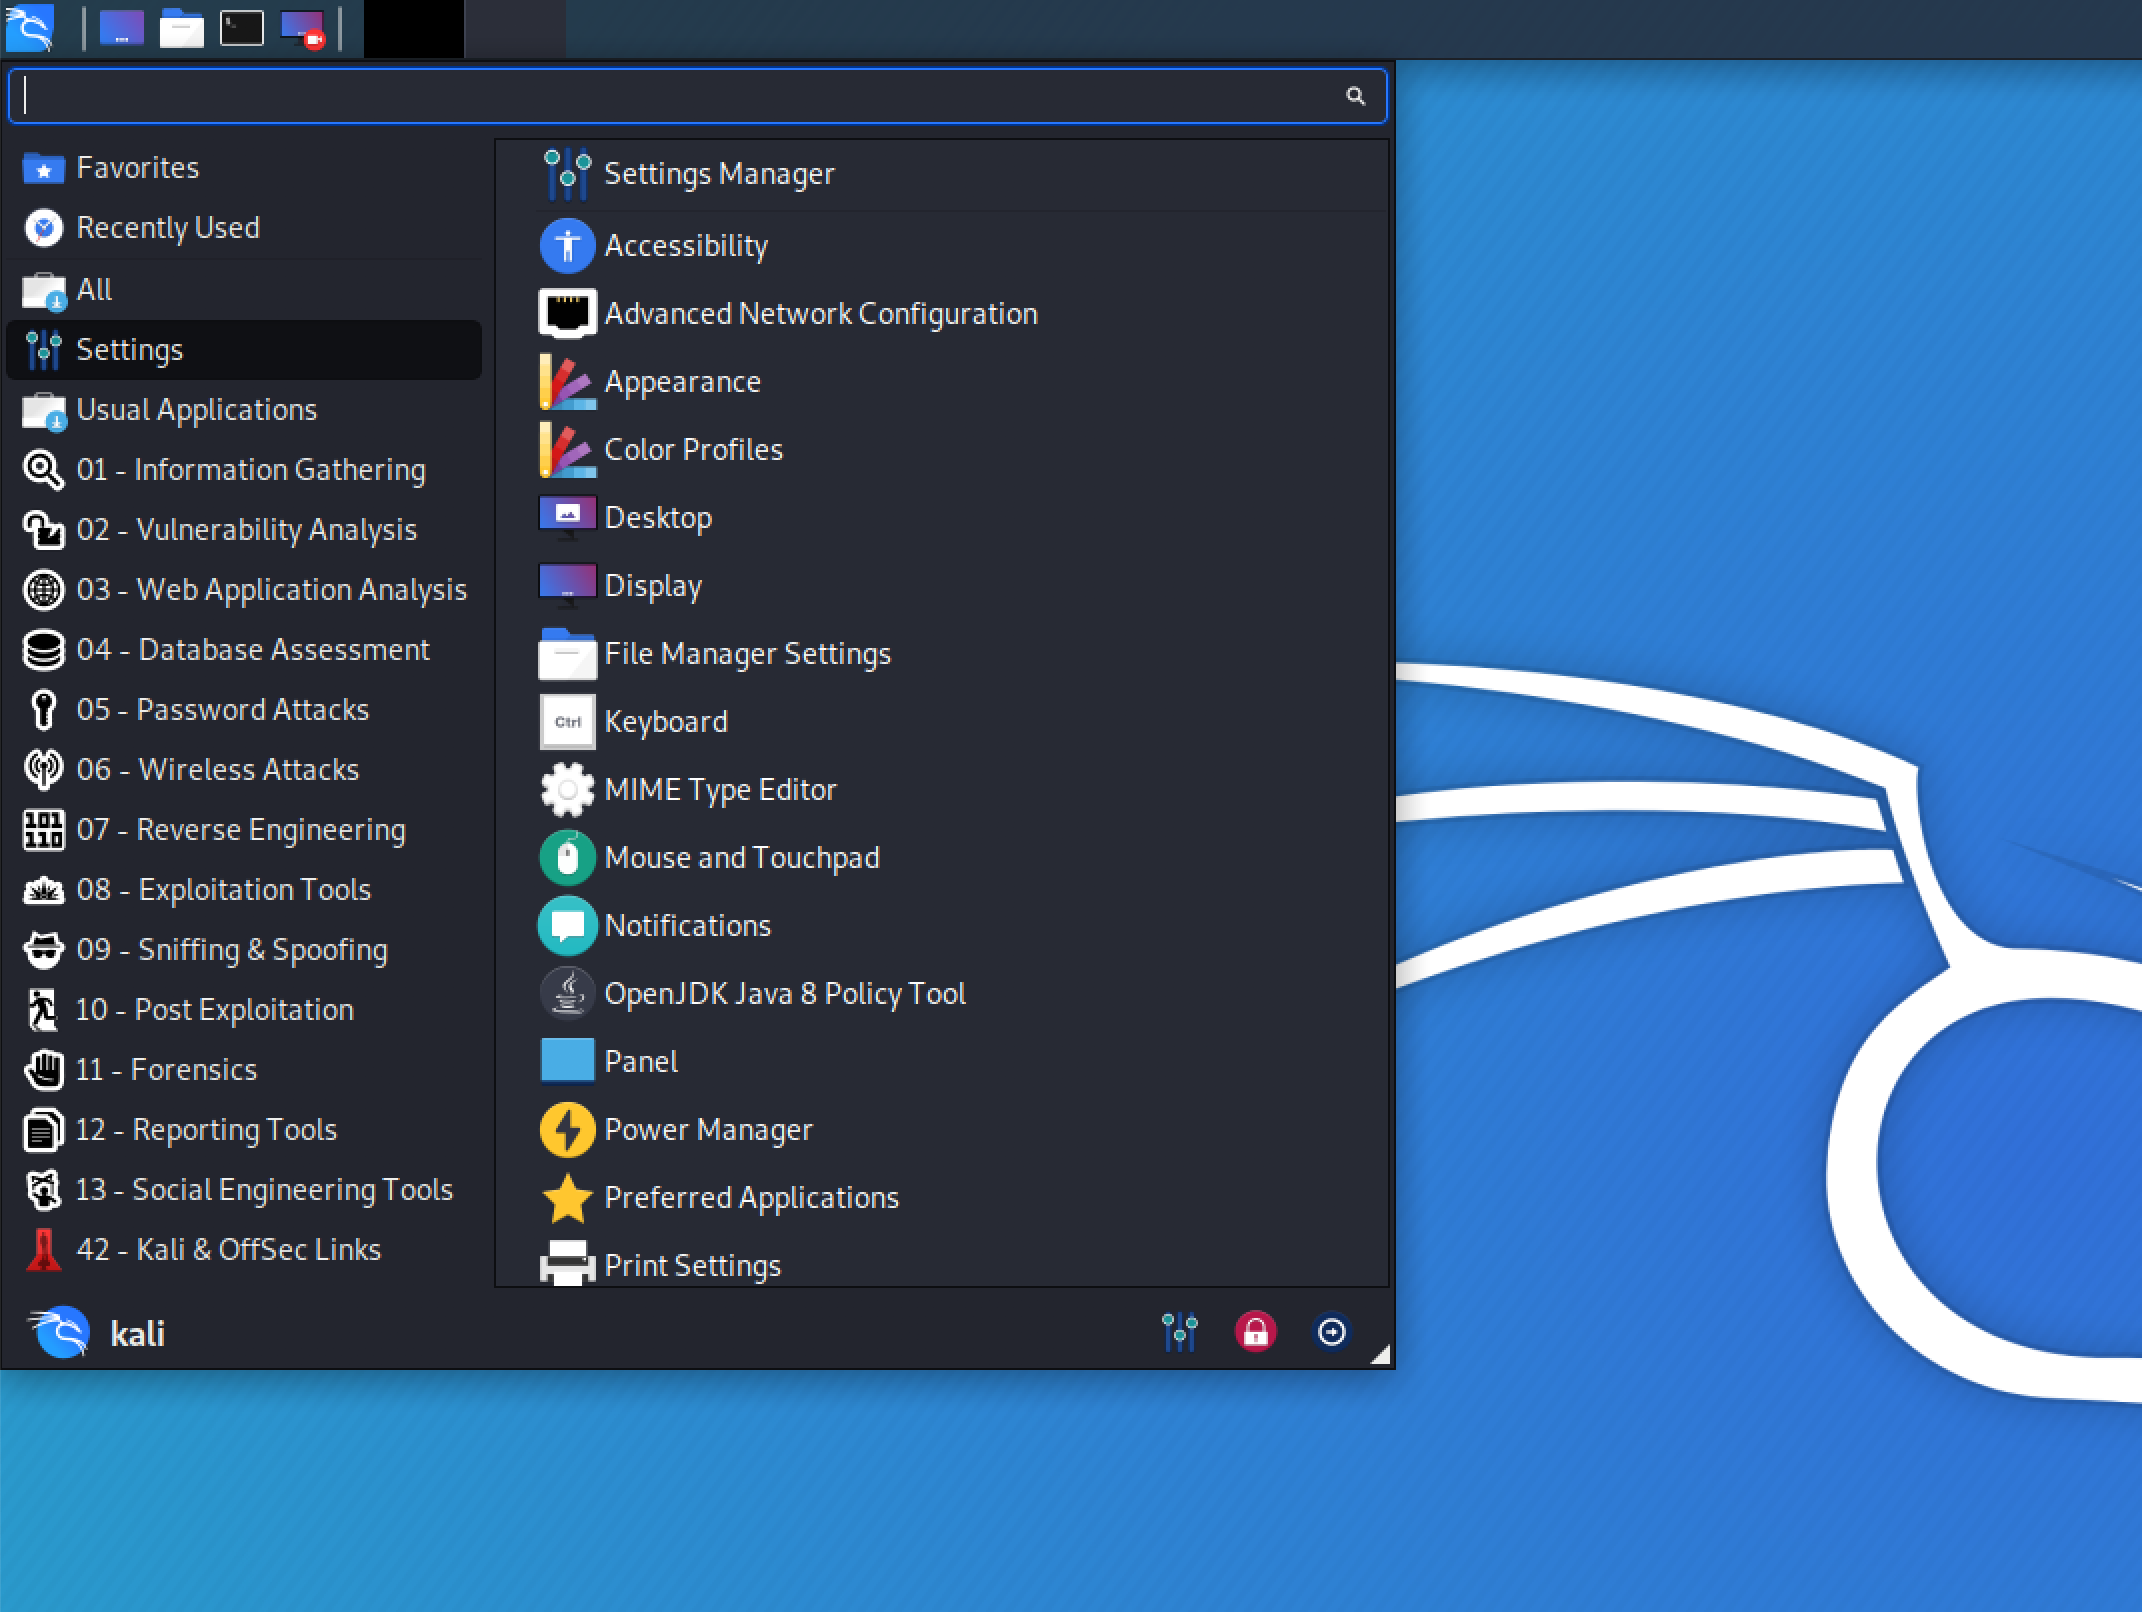
After installing the VirtualBox Guest Additions in Kali Linux reboot the VM to apply all of the changes. Then open the Kali Linux display settings. This is done by clicking the menu button in the upper left corner of the Kali desktop. Either search for Display or select Settings, then select Display.
In the display settings adjust the resolution to an acceptable value. It is important to note that while your display may be capable of 4000+ by 3000+ resolution, you may want to select a lower resolution such as 1920 by 1080. Although Kali Linux allows interface scaling to increase the interface size and maintain resolution, not all apps support this option. Many tools built on Java for example do not scale at all and this results in tiny unusable interfaces.
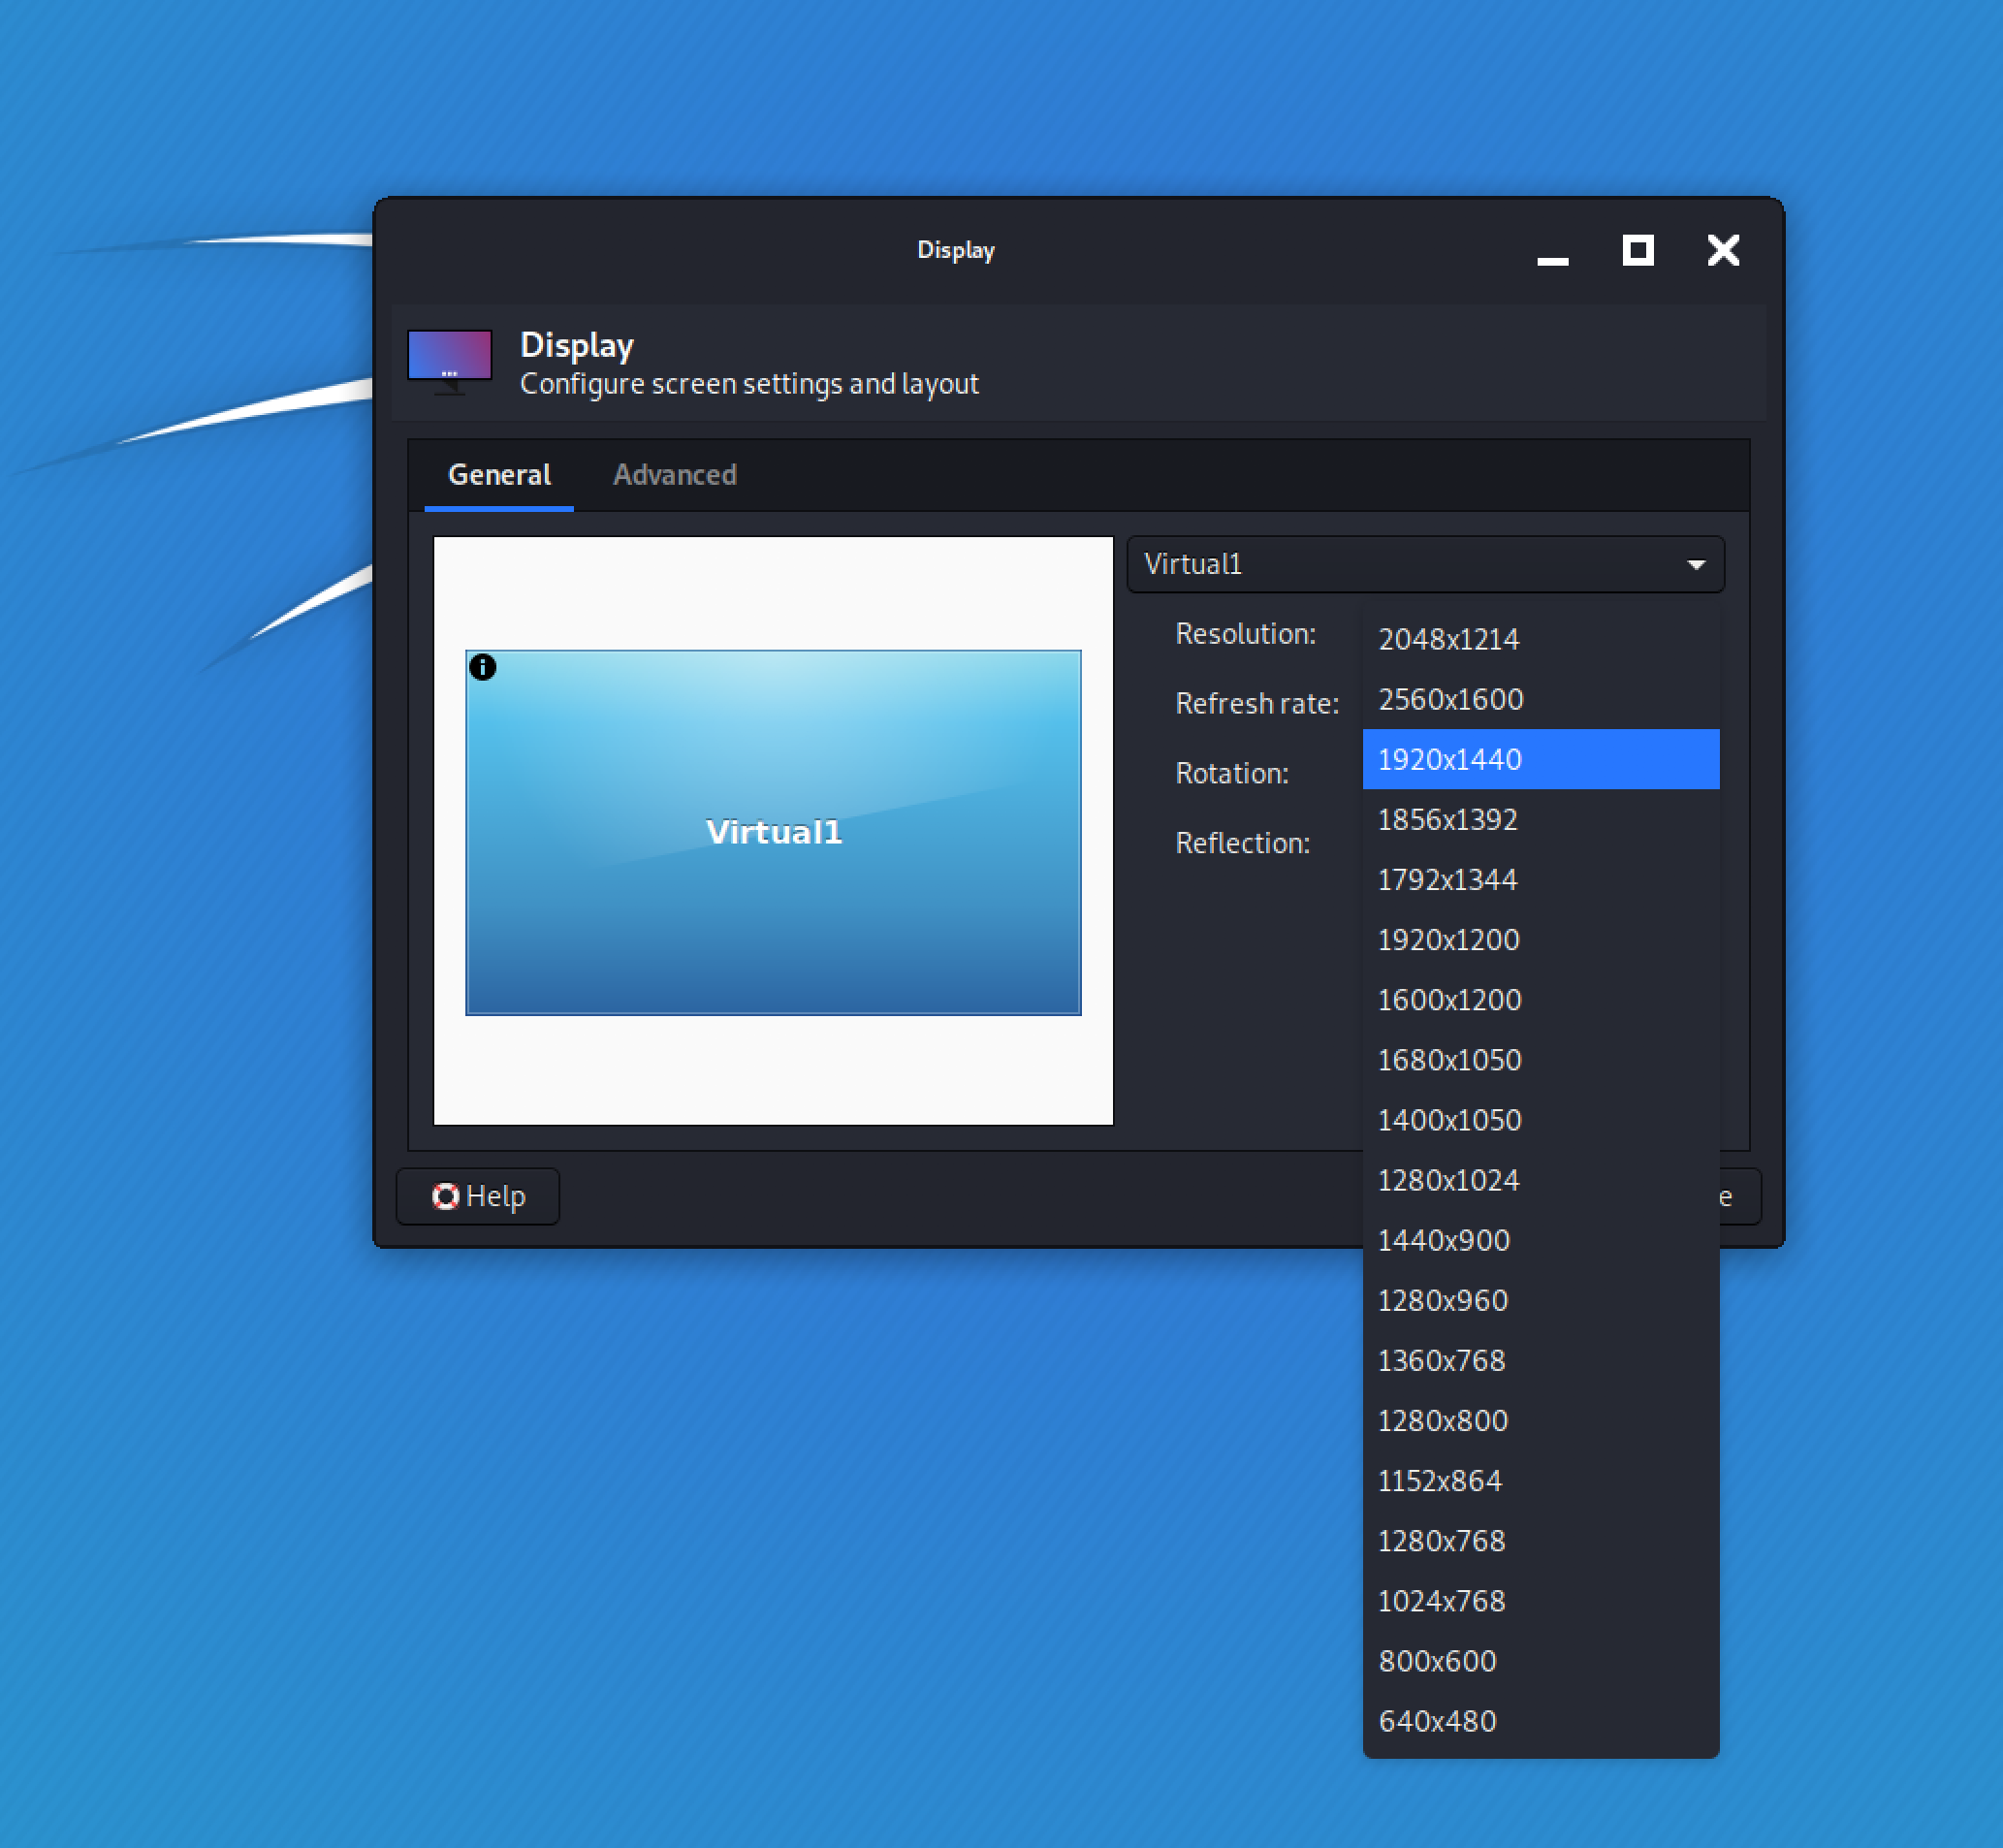
Adjusting the VM display settings
Once you’ve lowered the resolution in Kali Linux the window may now be surrounded by a thick black border. If this is the case, go to the virtual machine settings (in VirtualBox) and select Display. Then adjust the scaling factor to 200%. This will make Kali Linux full screen again…and with readable text!
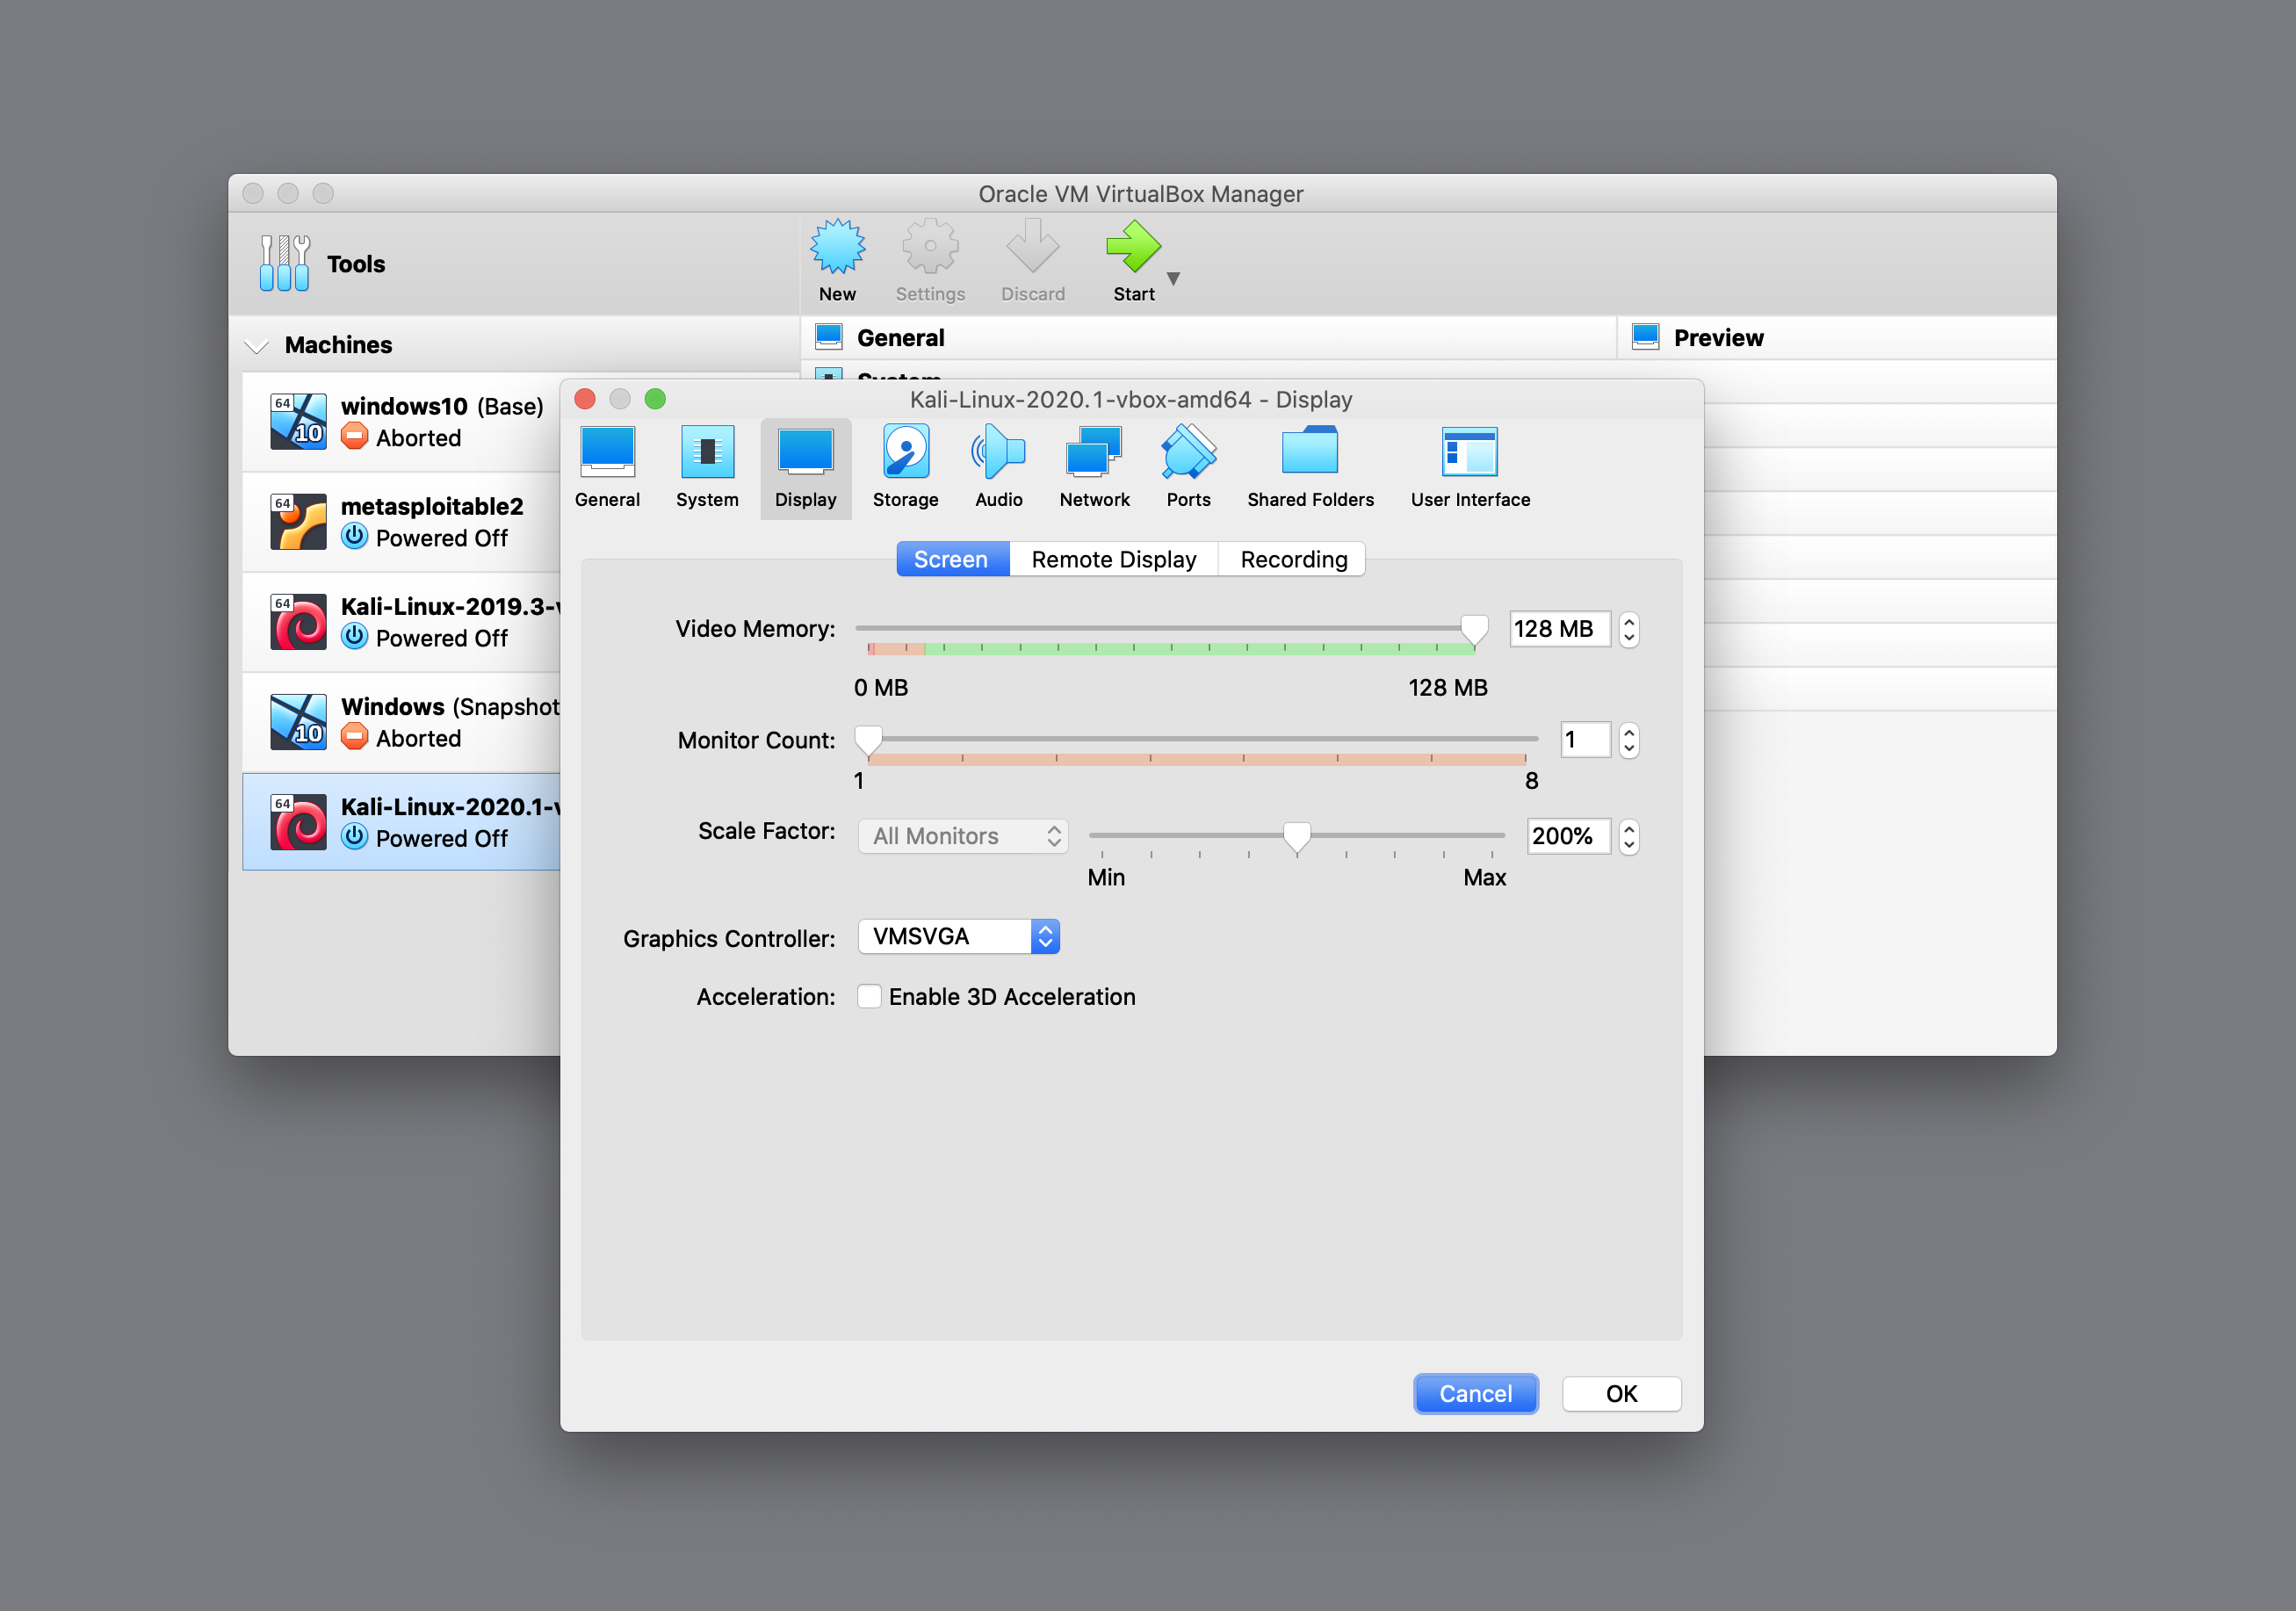
Kali Linux in VirtualBox
After tweaking the Kali and VirtualBox display settings, you should have a beautifully crisp installation of Kali Linux 2020 in VirtualBox on a Mac. Now you surely want to dive right in and start exploring. For instance, you may want to set up a vulnerable host and test some exploit tools.
Itching to hack something?
The best way to learn penetration testing is in a controlled environment specifically designed for exercising your penetration testing skills. You can get in loads of trouble ‘testing’ systems that don’t belong to you.
Metasploitable is an excellent vunerable virtual machine that you can set up alongside Kali Linux. This VM is loaded with security vulnerabilities to help expand your skillset. The tutorial below explains how to install Metasploitable in VirtualBox.
How to learn penetration testing with Kali Linux
Before you deploy Metasploitable, you may want to consider setting up a virtual penetration testing lab. This gives you a controlled environment to test your skills. Now that you’ve completed this tutorial, you already have the Kali host set up. After that it is just a matter of adding 1 or 2 vulnerable VMs to your network to practice on. The tutorial below describes how to set up an isolated network for testing your skills.
We hope you enjoyed today’s tutorial on installing Kali Linux in VirtualBox. If you have any questions or feedback please leave us a comment below!
4 thoughts on “Install Kali Linux in VirtualBox on Mac”
-
Pingback: How to Build a Virtual Penetration Testing Lab - Securing Ninja
-
Pingback: 7 Types of Cyber Attacks Targeting You Right Now! - Securing Ninja
-
Pingback: How to Create a Kali Linux Bootable Usb - Securing Ninja
-
Pingback: How to Use John the Ripper (Full Tutorial) - Securing Ninja
Leave a Reply